Showing posts with label mini album. Show all posts

Thursday, April 11, 2013

Usefulness of mini pads

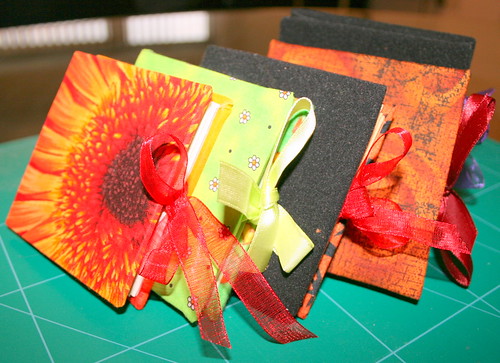
I have unknowingly amassed a collection of mini paper pads, from brights to pastels to bizarre prints. Strangely, I use them very little simply because I'm not sure what I should do with the tiny prints.

So far, I've use them on mini albums and not much else. However, I've started using them on cards, maximizing what I see on a single piece into a card.

Here are two that I did recently around the Easter theme. Both are birthday related. One is a tag, and the other is atop a little box. I finished the second with a tag that was hand-written as it felt more personal though it may look less professional.

Each were made from a single sheet of 6x6. Which do you prefer?


Saturday, July 7, 2012

Little Black Mini

We're talking about the paper kind :)


BbC and the Little Black Mini


July has been an unexpectedly busy month because my Indonesian live-in helper ran away.  She received some news that her son was sick and decided to run away to the embassy, leaving bbC at school.  I did manage to get her an airticket home, amidst a lot of tears and apologies from her and she texted me goodbye when she left. This hapless employer (me) zealously took over work and household, fell sick and then before I could recover, my BbC also fell sick! BbC, who was closest to my helper, fell ill  cos
  • helper gone.
  • abandoned in school 
  • had to shift to a totally new full day school 

because of change of arrangements and fell very ill.  So me, while being sick, still took over the household, took some childcare leave to stay home and nurse her to recovery during these 3 days.  Thankfully I have a very understanding employer...


Anyway, so I was arranging my desktop when I spotted the above photo and realised I never got round to blogging this mini.  It was one of those "I thought I already did but hey I didn't" slip up.  I did this for an album swap I organised in April.  It was for a scrapbooker who was also a fantastic tattoo artist and a biker chick.  Chic too.  So I made this for her since she now has a new cool baby.  I used a lot of black cardstock and white acrylic paint stamping as I was inspired by the black white ensemble I always saw her son wearing.  Here's all the tim holtz, spritzed up by Washi tape color, and some distress ink edged stamping pop up.

and here is one sample page.  For some reason I didn't take photos of the entire album and I didn't prop it up to take like usual. So pardon the weird background as the lighting was good for the black album.

I see you noticed the stitching!   Yes every page was stitched, and the album was stitched together as well.  I thought it would form a nice part of the accent and help to delineate the space .  Each page also had a little tab that was stuck on a repositinable washi tape so it could be attached to any note or photo or just moved around.  I especially love those little date washi that I stuck around so milestones could be recorded.  I had a page for mom, one for dad and many pages for the amazing everyday.

p/s : those cute semi colon are from catslifepress ... I had been eyeing them for the longest time.. cute!


Sunday, January 8, 2012

Mini For Baby J

Made this for Baby J's mommy, who is a great boss.  This little mini has all the photos of lovely baby J and I left the journalling blank so she could put down unforgettable moments for memory.  I hope this little album will bring her much joy when she is stressed or need some additional energy!

I tried something a little different on this mini cover. It doesn't show as much on a top down photo, but it is actually dimensional and quite layered.  I took a quick shot of a side view so you can have a good idea of how to bring up the layering.


The photo rests on top of the layered ruffled ribbon on one side, and tulle, chipboard elements and glittered leaves on the other.


Materials : Kaisercraft Beyond the Page Mini Album; Papers, Chipboard Elements and Sentiments - DCVW, K&Co;  trims and roses.

Sunday, October 9, 2011

One-Sheet Mini Album Link up!

I was going to post up instructions for the Mini Album that I did for Making Memories, but I did a google and found a tutorial done by Avital  in 2008 and it was a spin version as they used Fabric for cover.  I was quite impressed, so I'm going to do a link up here to  her blog!


Avital's Mini Albums


The difference between hers and mine is that hers has a ribbon while mine has a spine!  If you need me to show you a pix or a sample, let me know, I'll be happy to oblige!

Thursday, September 29, 2011

Making Memories

Note : This was first featured as Guest Designer Feature on 28 Sept 2011 in Making Memories Blog.

A good friend of mine is getting married very soon and I won't be able to attend his wedding due to work commitment.  I wanted to create a small memento that would be meaningful to him and special to her.  As I love altering items, this is when  I gave a new lease of life to a simple diskette box.  I made a mini album to fit the box, with space in the box to spare for them to keep additional notes or photos.
For this project, I hunted down all the remainder stock of Je T'adore in Singapore and used a total of three 12x12 papers from the Je T'adore paper - Tres Jolie Collage , French Dictionary and Floral Ledger and the brads and accoutrement pack.  Je T'adore is such a gorgeous collection.  The box was covered with French Dictionary trellis pattern paper on the sides,  with Tres Jolie paper in front.  The mini's pages are made from a single sheet of Floral Ledger paper and the covers from Tres Jolie paper.

In any project, a slight alteration can make a big difference in the end results.  I will share a few from this project over here.
1) The box is upcycled from an old diskette box, covered in double sided patterned paper. As the box is transclucent, you can see the pattern inside and the other pattern outside.
  
2) This pair of kissing swallows are from the Je T'adore accoutrement pack. They are originally light pale pink and I covered them in a thin layer of bronze crackle paint.  After the crackle dried, it broke nicely to show the pale pink under the bronze, giving it a bit of the vintage look.
3) Don't be afraid to mix and match. I have here 3 types of roses - a brad, a resin flatback and a paper rose.  See how well they go together?

4) Use words on patterened paper as highlights by boxing them or matting them.  This was from a phrase in the French Dictionary paper.

5) Give dimension to your fussy paper cuttings by painting them with a layer of glitter glue and distressing and curling the edges of the cut.
Hope you enjoyed the tips I shared!

FOLLOW on the right hand side if you want to be notified when the tutorial on how to make the mini album comes up in a few days' time!

Sunday, September 18, 2011

Teacher's Day

In the month of September, Teacher's Day and Children's Day in Singapore has been changed to the first Friday of the month.  Ms E prepared a number of cards for all her teachers and for one special art teacher Joanne we had something different.

My friend KP attended a class and was going to impart some of her learnings to us at one scrapbook session, but as she was caught up in a meeting and could not excuse herself, many of us were left what to do.  Basically, we never got to start the class and never got round to having a lesson.  All of us took our cardboard pieces home and this is how mine turned out to be.

This is my intepretation, sprinkled with what I think teacher Joanne is like. Sweet, electic, different and a little unique.


This is the front of the House.  It's a 3D box, with butterflies soaring away from the house like ideas generating and growing. This "House" holds an electic album of mish mash papers, pockets and sizes. 
 

The mini album inside mirrors a little of the front, and is made in a flip book style

The back of the House is decorated with Ms E's picture and is deliberately finished off with a row of kiddy pearls for that slight childlike finish

To make the album, I added components made by Ms E to personalise the inside with little embellishments, multipocket pages and sparkly stuff.  She was happy and I think teacher Joanne was to.


Materials : Papers - DCVW, K&Co, Kaisercraft, October Afternoon; Embellishments - DCVW, K&Co, Kaisercraft, Making Memories; Ribbon - own; Punches - MS. 

Sunday, August 21, 2011

Mini for Mummy

It's been a long time since my last post as I had been busy and couldn't find time to take photo when it was not raining. Finally I managed to catch some golden sun today after so many days of afternoon rain, so I quickly had this mini album photographed and tonight I get some moments to blog about it.

I had been altering things and making scrap stuff here and there for people and thought I should make something for my mom. So I set about choosing photos (the hardest part as there are so many!) and defining the moments before putting them into this little album. There are never enough pages for books like this, I'd say!

Here are the pictures.  I love this album because, again, it has lots of experimental stuff that I tried and I find that it is like an archive of both memories and progress.  Ms E loves the book because she would take the book and flip almost every night.

I won't show all the pages, but here are some that I would like to show.


Materials : Album - Me & My Big Ideas; Papers - Prima Annalee; Stamps - Fiskars, Purple Onion;  Embellishments - Making Memories, K&Co, Joann.com, Tim Holtz, Ribbons, Handmade flowers, Basic Grey, KCK, Glitz Girls.

Tuesday, May 17, 2011

Memories in a book

I did this as I wanted to gift something to my wonderful sister-in-law Caroline and also partly as a challenge to myself to produce a mini that would be both experimental in the use of materials and mediums. Made 99% from Kaisercraft's range of products, I did this over a few nights and was very happy with the end results.  Do let me know what you think.


Made in the style of travel tabs and journal books.


Paints, blending, stamping, stickles, dimensional paints, handrawing, punching


Painted edges, punched decorative edges, hand-drawn and glitterised rainbow


Flap and folder page.


Hidden pockets all open.


 Photo layering of colored on black/white, finished with clear crackle paint, burnished with Dimensional paint on the edges, and rubbed with rock candy stickles, and popped with pop dots. I wanted the make the photo have a magical feel that Disney always wanted to give.


 Stamping with crackle paint.

 
How it looks, upright. Tabs and all.

Friday, March 18, 2011

Mini Memory Box

Here's a little something I did for a project a couple of weeks back. It's a little altered 3" diskette box left behind by my ex-colleague, who knew I wanted to collect junk for all kinds of purpose - like alteration. So I liked this very much and thought it would sit very well on my cramped work desk and could also contain all the tiny little moments that I laughed about. I made it so I can pull out one like antidote anytime I need to a quick stress relief!


This is how the box with one little sample layout looks like.  I put in one where BbC looked surprised when Ms E "kissed" her with the plastic goose. Look at that expression!

 
Pull down to open up, and flip through the layouts at random!

And a front view of it. I didn't want to alter and cover it like what most scrappers would do, as the best things are not covered but for peeking. It was also to create a peekaboo effect. I fussy cut the MLS papers to trim out two girls that Ms E said best represented the two of them, and trimmed a little fence with my punch to give the whole thing a little depth and dimension (and meadow and flowers and such) . As usual, I touched up everything with a hint of glitter from stickles.

This I think is one of my best projects so far. Enjoy!

Materials : Papers - My Little Shoebox PP, DCVW cardstock; Adhesives - Helmar, Scrapbook adhesive foam square; My Little Shoebox Stamp; Ranger Stickles;Martha Stewart Punch

Last edited to add night shot :

Thursday, January 27, 2011

Wedding Guest Book

I was asked by my one and only sister-in-law whether I could work on a guest book for her third sister's February wedding. I thought about it long and hard before embarking on the project as I wanted it to be meaningful to the guest, as well as the wedding couple. My sister-in-law gave me some photos she got off the couple's facebook albums and I did some adjustments before working on the layout as I heard there was no studio photos yet. Can't believe most were taken on and adjusted in iphone apps right? Special effects rocks! :)

The cover measures 12 x 6, wire bound with the zutter.

The inside page of the bride (trying her chosen gown hence the K&Co papers to match!)
Close up

 One other page (there were 12 in total, and guests were to sign in metallic gold pens.